Is It Possible to Transport a Chest Freezer on Its Side?
Sometimes your chest freezer needs to be moved for a variety of reasons.
It could be that you are moving houses, transporting them to your home after purchase, or taking them to a different location.
Is it a good idea to move it on its side, upright, or at a particular angle? The experts we consulted explained the correct method of transporting your freezer.
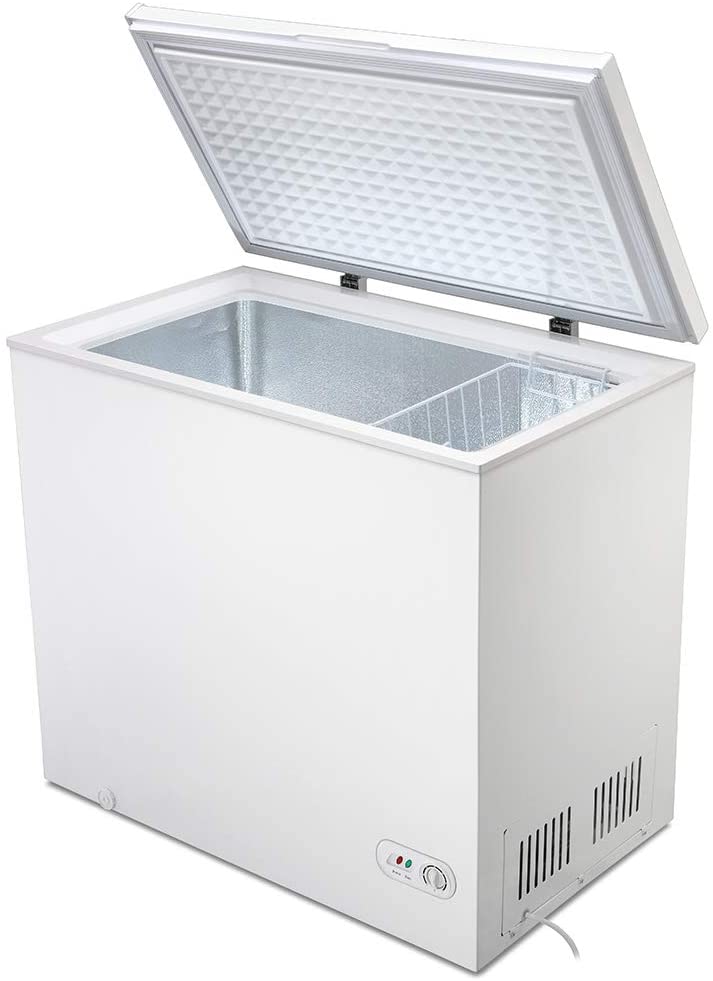
There is a chest freezer on the side that has a compressor. The safest way to transport your chest freezer is in its upright position.
Follow the steps to get the best practice in transporting.
- The electrical cable needs to be unplugged from the power point.
- Take out the food.
- Defrost your freezer.
- Clean and dry it thoroughly.
- Secure your freezer.
- Measure your freezer, doorways, and stairwells.
- Request for help.
- Move your freezer to the truck.
- Put your chest freezer in an upright position on your truck.
Continue reading to learn how to plan ahead and safely relocate your appliance so that your chest freezer is not damaged during transportation.
Table of Contents
How Can I Properly Transport My Chest Freezer?
Unplug the Electrical Cables
Plugging your freezer from the electrical outlet is how you need to switch it off.
It’s a safety measure for you and your appliance to make sure that the freezer’s coolant doesn’t get damaged.
Take out the Food
All the food must be removed from your freezer. If you have more food than you can eat, give it to your friends, family, or a local food bank.
You can remove the ice maker from the freezer by following the instructions in the freezer manual, or you can seek help from a professional.
Defrost the Freezer
It’s a good idea to defrost your freezer one day before you move. The recommended procedure in the manual is different for Freezer models.
After your freezer is empty, make sure the door is open to make sure all the ice is gone.
Some models allow you to pour warm or boiling water inside to melt the ice faster, while others may require you to thaw them outside.
Some have a hosepipe that is attached to the water. By threading the end of your garden hose to the drain plug in your freezer you can drain the water outside or into a sink.
Clean and Dry Thoroughly
If transportation will take a long time, it’s important to clean and dry your freezer thoroughly so that it doesn’t get mold.
If you want to clean your freezer, use a mild detergent like the one you use to wash dishes, or if you want to go green, you can use vinegar or baking soda.
You can wash the inside of the freezer by putting either of these into a bowl of warm water and using a cloth or towel.
It’s a good idea to rinse with plain water to get rid of any residuals. To dry it out, pat it dry, and then leave it to air dry for at least 24 hours, making sure it doesn’t have any humidity.
If there is still a smell in the freezer, you can put baking soda into a liter of water and place it in the freezer for up to four hours.
If the smells are too strong, place some activated carbon inside a small bowl and leave it in the freezer for a couple of hours.
Secure Your Freezer
After cleaning and drying your freezer, close the door and use moving straps or ropes to secure it to avoid the door opening accidentally.
It’s a good idea to tape the power cable to your freezer to prevent tripping it. It is better to use masking tape because it won’t ruin the surface.
Soft padding can be created by wrapping blankets over the entire freezer. Tape the blankets to prevent them from unfolding during transportation.
Measure Your Freezer
Measure your chest freezer, the stairwells, and the doorways to make sure it will pass through without a problem and into the dolly.
It can be difficult to figure out at the last minute.
Request for Help
To prevent injury to yourself, you may need some help from family, friends, or a moving company.
Don’t forget to wear clothes that you don’t mind getting dirty and non-slippery sneakers.
Move Your Freezer into the Truck
If you want to move your chest freezer out of the house or its current location, you can use an appliance dolly.
If you want to adjust the load on the 4-wheel platform, you need to tilt the freezer to one side, glide the dolly to the underside, and then pull the load backward.
After fastening the freezer with rope or straps onto the dolly, you can move it to the truck.
Load Your Chest Freezer
Slowly move up the truck’s ramp and into the truck with the extra workforce available.
As your labor force pushes from behind, you should pull the dolly from the front to ensure it is well balanced.
You can place your chest freezer on its feet once inside the truck. The freezer should be secured to the side of the truck with rope or straps.
What Happens When You Lay a Freezer on Its Side?
If it is not possible to put your chest freezer in its normal upright position, lay it on its side with the compressor. If you’re in this position, make sure the door is firmly secured.
When you get to the new location, set your freezer upright and allow it to sit for an equal amount of time as it did when it was on the side, though up to 24 hours is fine.
The bottom of the chest freezer is where the compressor is usually located. It’s usually black and about the size of a football.
Do You Need to Let Your Freezer Sit Before Plugging It in?
When you have an appliance that is in transit, it gets shaken a lot.
Allow it to settle before plugging in so that your freezer remains in proper working condition when it arrives at your new location.
If the compressor leaks oil into the freezer system during movement, it can cause a problem with the cooling function when it’s turned on.
How Long Will It Take for a New Chest Freezer to Be Ready?
After your freezer is delivered, the company that you bought it from may recommend at least 8 hours for it to settle.
It’s best to allow up to 24 hours for your freezer to be ready before plugging it in, especially if it was transported while on its side.
How Can I Move a Chest Freezer by Myself?
If you don’t want to use a mover’s company to help you move, your friends or family can help. To make your chest freezer’s safety a priority, follow the steps provided above.
How Long Must a Freezer Be Unplugged Before It’s Moved?
If you don’t unplug your freezer for 24 hours before you move, there will be damage to the coolant and coils inside it.
Is It Needed to Empty My Freezer Before Moving?
It’s important to empty your chest freezer if you’re planning on moving. During transportation, the ice will thaw and the water will leak onto the truck creating a mess.
The general rule is to transport your freezer when it’s not used. It is important to read your manual for specific instructions on how to move your freezer.
Conclusion
You can use a chest freezer in your home, but it is hard to move. It requires you to follow the correct guidelines to safely move it.
You have to plan well before the actual day of moving to avoid last-minute challenges that may affect a smooth move.

Foodie and a passionate cook, I am here to share all of what I know about cooking, kitchen, and food prepping.
Follow me for delicious and healthy recipes.