What To Do With Damaged Freezer Lining?
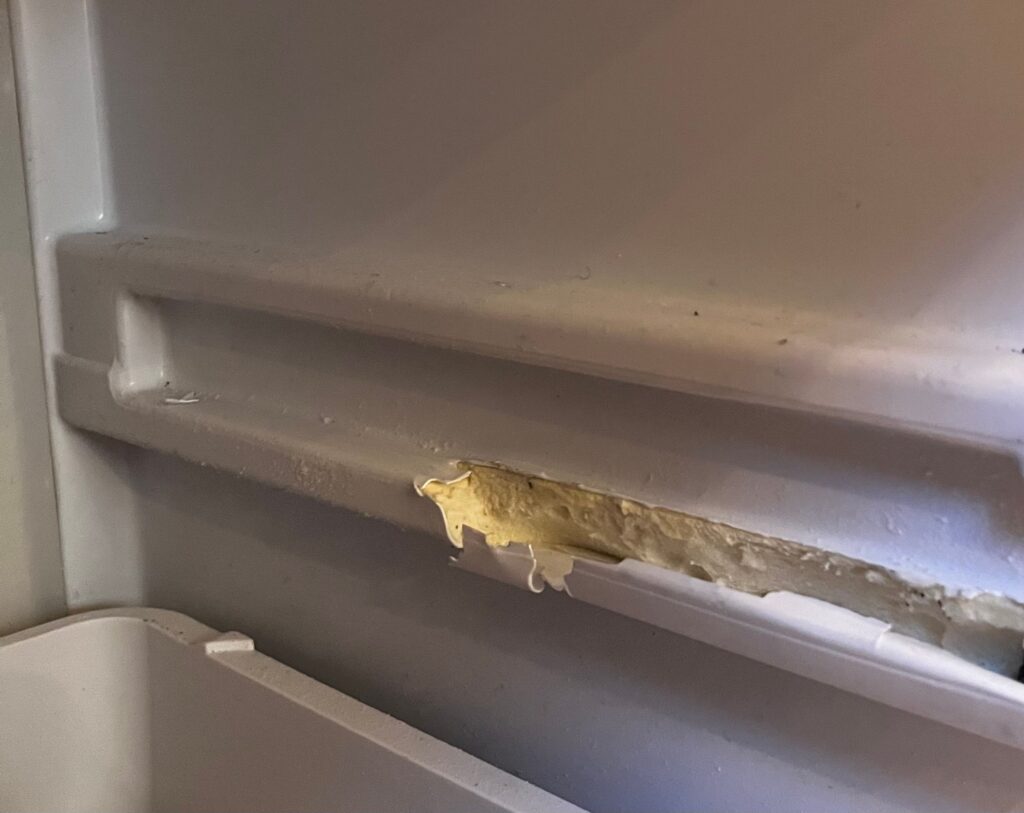
The plastic constructions of the freezer linings are found near the interior sides of the freezer doors.
Misuse, overstocking, and general wear and tear can damage the lining of the freezer, leading to its shortened lifespan and other problems.
But what to do with a freezer lining that has been damaged? Will you be able to tell if this component has been damaged? We asked the experts and here is what they came up with.
Before attempting repairs on the damaged freezer lining, it is necessary to determine the cause and extent of the damage. There are several ways to resolve this issue:
- Check the seal of the door.
- If debris is stuck in the lining, remove it.
- Take notice of the damages, such as bent or warped corners.
Continue reading if you want to learn more about these methods. We are going to talk about the methods you can use to fix the damaged lining.
How to fix specific issues in the freezer are just some of the relevant pieces of information that we will tackle.
Table of Contents
Troubleshooting a Damaged Freezer Lining
The first part of any repair job is to find the cause of the problem. That way, you can do a permanent fix instead of a temporary one.
Take Note of Visible Damages
It might be hard to find issues that lead to damaged freezer linings with the naked eye. Some problems are easy to see.
Some of the concerns include bent or warped linings.
You must check for these signs of damage at least once every year. More serious concerns can be caused by Linings that are not in their original shape.
Remove Stuck Debris
Foodstuffs and other small items can get into cracks in the lining. The crack will become larger over time if these objects are left in their current locations.
After removing stuck debris from the cracks of your freezer lining, you’ll be able to use the appropriate repair methods.
Check the Seal
The seal on the door should be checked first. When the door is closed, the freezer lining should be flushed against it. There are damages to the lining that can disrupt the closing.
If the seal on the freezer is faulty, it will prevent it from closing properly. An improper seal can increase the freezer’s energy output and cost more.
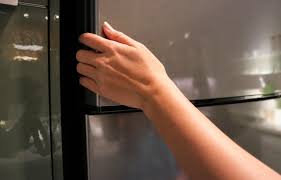
Near the freezer’s door is where you can put your hand. The lining of the appliance is likely to be damaged if you feel a draft.
If your monthly energy costs suddenly rose, that’s another way to find out if there’s something wrong with your freezer lining.
How To Fix a Freezer Liner?
The damaged freezer lining can be repaired by determining the source of the problem and using the appropriate method.
There are two ways to fix an appliance’s liner:
Fix a Freezer Liner Crack
You’ll need:
- Liner repair tape
- Food-grade silicone sealant
- Paper towels
- Rubbing alcohol
- Sandpaper or sanding machine
- Drill
- 1/16-inch drill bit
- Blankets
- Large containers like laundry baskets
If you need to cut the power in the room to repair the freezer lining, you may need a lamp or light source. Next, follow the instructions to fix the crack.
- The best option for your situation is to unplug the appliance or turn off the room’s power.
- Put the contents in large containers after they’re removed.
- If you took the food out of the freezer, put it in a blanket.
- The freezer should return to room temperature after a few minutes.
- To drill two small holes on both ends of a crack, use a drill with a 1/16-inch drill bit.
- While the appliance is still cold, drilling can increase the crack size.
- The crack’s edges should be scruffed with the help of the machine.
- After smoothening, wipe the sanded area with a paper towel or rubbing alcohol.
- Squirt a large amount of food-grade Silicone along the crack.
- The drilled holes need to be filled as well.
- Take your thumb and smooth it with silicone.
- If you don’t want to mess up your hands, you can use gloves.
- Put a piece of liner repair tape on the silicone.
- Bring the items back into the freezer.
General Plastic Liner Repairs
There are many small issues with damaged freezer liners that can be repaired. If you put off the repair jobs for later, the problems will increase and you will need to act fast.
The general repairs on your freezer lining can be started by gathering the following items.
- Sandpaper (100-grit)
- Refrigerator liner repair kit
- Pair of scissors
- Latex gloves
- Clean cloth or rag
These are the steps to repair your damaged freezer lining:
- The freezer should be turned off so that the shelves and food can be removed.
- The damaged area should be prepared with a sanding block or 100 grit sandpaper.
- If you have latex gloves on, use the repair kit on the offending area.
- Cut the fiberglass cloth from the repair kit and put it on top of the damaged location.
- The fabric should be stretched so that the remaining quarter is snug.
- There is a thin layer of sealant on the fiberglass strip.
- Put a bit of pressure on it to get the glue to bond and to stop the wrinkling that may occur.
- Before you return the shelves and food items to the freezer, apply another layer of sealant.
How to Identify If Freon Is Leaking from the Freezer?
Some gasses and liquids are odorless and non-flammable that are used to keep freezers, air conditioners, and other appliances cool.
A freezer that does not have freon output feels warm inside. The risks of spoilage are increased by the fact that the appliance won’t produce enough cooling.
If food is left in an inadequate environment for more than four hours it will become spoiled, according to the US FDA.
Foul smells can come from spoiled food because the freezer didn’t provide sufficiently cold temperatures.
Freezers that leak freon will make their compressor and condensers work better. The average electricity bills will be higher than you will experience.
If you are not sure if your freezer is leaking freon, you can use a leak detector.
How to Fix a Hole in the Chest Freezer?
The process for repairing a hole in a chest freezer will depend on where the hole is in the appliance.
You can use the items and steps mentioned in the previous section to make general repairs for external holes. The steps to repair a hole in a chest freezer are available here.
- You can cut the power to the chest freezer.
- The freezer door should be open.
- If the door shuts automatically, leave an item in the gap such as a stick or piece of cardboard.
- Cut a piece of waterproof marine filler that is about a quarter of an inch in diameter.
- Put the two-step glue in the hole.
- The product should adhere to the hole if the product is pressed for about 5 minutes.
- It must be dry for 24 hours before it can be put in the freezer.
What Glue Needs to Be Used in a Freezer?
Glue is needed for a lot of freezer lining repair jobs. Don’t use just any glue that you can get on the market.
It’s important to make sure that the glue is food-friendly and resistant to extreme temperatures. If you want to do quick repair jobs, glue with a fast rate is advisable.
Is It Dangerous to Have a Crack in a Freezer?
Serious problems can be caused by freezer cracks, such as food spoilage and increased energy bills.
Excess condensation can occur in the freezer because ice can build up quickly. A lot of condensation can lead to a lot of extra condensation, which can lead to mold growth.
Conclusion
You can troubleshoot for cracks, holes, and other issues on your freezer lining to see the sources and extent of the damages.
To make appropriate repairs, you should gather the necessary tools, such as silicone sealants and food-friendly adhesives.
You should be able to work your freezer efficiently with proper lining.

Foodie and a passionate cook, I am here to share all of what I know about cooking, kitchen, and food prepping.
Follow me for delicious and healthy recipes.